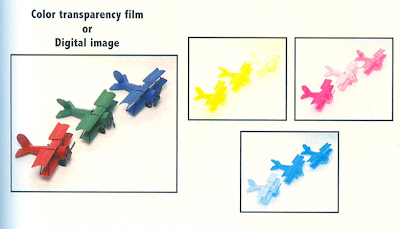
Pictured above: Basic Color Film Structure
How is color recorded differently on Film vs. Digital\?
Negative vs. Transparency:
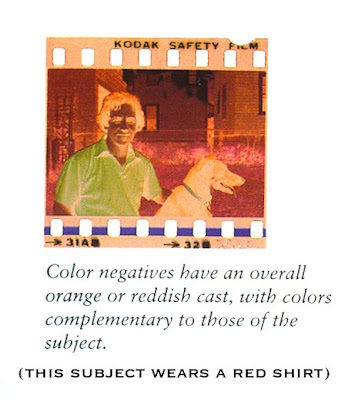
Negatives show reverse (complimentary) tones of the original subject and have an overall reddish-orange cast. This orange cast helps to control color balance and contrast in printing.


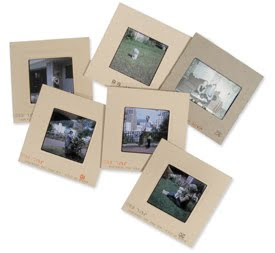
Transparency (Chrome) Film is used more professionally. It shows a positive image of the subject and can be easily viewed on a light table. The film itself is more expensive, however you don't need to make a contact sheet.

There is generally more flexibility in push and pull processing when shooting a negative that when shooting a slide.
Push Film Processing: (brightens the film) over-development of the film, compensating for under-exposure in the camera.
Pull Film Processing: (darkens the film) a technique that compensates for overexposed film by under- developing it at the processing stage

This difference could be compared in digital photography to shooting a JPG (chrome) vs. RAW (negative). Negatives (like raw images) have more exposure latitude and better correctability when printed. Chromes or Jpgs aren't so forgiving or flexible.
Professional vs. Amateur Films:
Professional films are manufactured according to specific color specifications so that one can control color. An amateur version of a certain film may have more saturation or higher contrast for added impact, whereas a the pro version of that film may have less intensity and contrast to allow for more accurate skin tones or greater detail. This difference could be compared in digital photography to shooting a JPG (amateur) vs. RAW (pro). A JPG has automatic settings applied whereas in a RAW file, the photographer is able to manipulate the color and contrast greatly.
JPG vs. RAW:
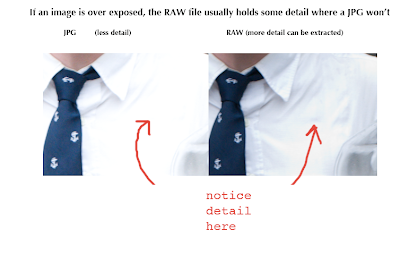
If exposure is reduced on an overexposed raw image (instead of a JPG), much more detail can be salvaged.

Emulsion Batches vs. Color ICC Printing Profiles:
ICC profles are explained HERE.
For a list of Adorama's Downloadable ICC profiles to match their paper types, click here.
When using film, emulsion batches are used in processing to help get the colors exactly how you want them. Each batch is subject to minor variations in color balance, contrast, etc. Each batch has its own number printed on the film. When shooting film, buy several of the same batch, shoot a test roll & process it. Add filters as necessary to get the colors exactly how you want them. Be sure to print always at the same lab to get the results you want.
Similarly, in digital photography, you can use specific printing profiles. Assigning a specific profile to a TIFF can change the colors in the print. The paper also plays a roll in the way the colors will look. Always working from the same monitor and with the same lab, make a series of prints with different ICC profiles until you get a print with color that matches your monitor exactly.
Daylight Film vs. Tungsten Film:
Similar to the settings in our digital cameras, film is based on Kelvins. Most color films are daylight balanced (5500K) which is average color temperature in direct sun at noon. If you are shooting with this film on a foggy day you may want to use a filter to get the colors correct. Color daylight film will also work indoors when using electronic flash because the output of the flash is about the same temperature as sun (about 5500K). Tungsten film is set to 3200K and is made for indoor lighting (and no flash). If shooting indoors with florescent lighting, it may be necessary to use a corrective gel or filter on your lens to get the color temperature right, as different bulbs have different color temperatures. (Other types of tungsten film are available to buy as well but are not as common). Negatives can be filtered when printed to correct color but with transparency film it is not as easy.
Film Characteristics: Different color films record color differently. Some make colors more vibrant, others make the same colors more muted. The same red balloon shot with one type of color film may look like a different shade of red when shot with another type of film. In digital photography, these colors can be quite easily manipulated and corrected using Photoshop.
Correction Filters (used to correct color temp when shooting film)
Filters can be used on the lens or light source when shooting FILM to adjust the color temperature and make to colors come out correct. Remember that you also need to adjust your exposure to compensate for filters used. Here is a chart of filters and when to use them:
CC filters and 80 series filters that are commonly used.

To more precisely figure out filter factors, first read this chart.
Then use this filter factor converter:
http://www.fineart-photography.com/ff_fs.html
No comments:
Post a Comment